Dealing with a fungal nail infection can be frustrating and embarrassing. The discoloration, thickening, and brittleness are not just cosmetic issues; they can be painful and stubborn to treat. If you've decided to take control with an at-home solution like the Lunavia Toenail Fungus Pen, you've made a smart choice for targeted treatment. However, the key to success lies not just in the product you choose, but in how you use it. This comprehensive guide will walk you through the correct application process, timing, and essential tips to maximize the effectiveness of your fungal nail repair journey.
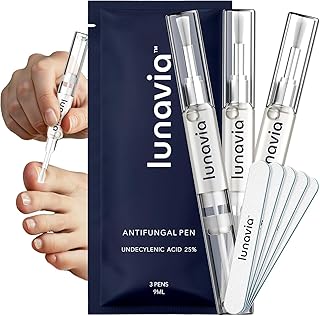
Understanding Your Tool: What is the Lunavia Fungus Pen?
Before diving into application, it's helpful to understand what makes this pen a popular choice for onychomycosis treatment. Unlike messy creams or harsh oral medications, the pen offers a precise, no-mess application. Its formulation is designed to penetrate the nail plate to target the fungus where it lives. Using it correctly ensures this active ingredient reaches the infection site effectively, making it a powerful tool in your nail fungus treatment arsenal.
Step-by-Step Guide to Using Your Lunavia Antifungal Pen
Step 1: Preparation is Key
Proper preparation sets the stage for effective treatment. Start by washing the affected fingernails or toenails with soap and warm water. Dry them thoroughly with a clean towel, paying special attention to the spaces between toes or fingers. Moisture is the enemy of healing, as fungi thrive in damp environments. For best results, it's often recommended to gently file down the thickened nail surface before application. This thinning allows the treatment to penetrate more deeply. Use a disposable emery board and file in one direction to avoid damaging the nail layers.
Step 2: The Correct Application Technique
This is the most crucial step. Shake the pen well. Twist the base until a small amount of liquid appears at the brush tip—do not oversaturate. Apply a thin, even layer directly onto the entire surface of the infected nail, including the underside of the nail tip if possible. The brush allows you to coat the nail precisely without touching the surrounding skin excessively. Ensure you also apply to the nail folds (cuticles) and the skin immediately adjacent to the nail, as the fungus often resides there. Let the solution dry completely for 60-90 seconds before putting on socks or shoes. This drying time is non-negotiable for proper absorption.
Step 3: Establishing a Consistent Routine
Consistency is the cornerstone of successful fungal nail repair. For the Lunavia Pen, most protocols recommend application twice daily—once in the morning and once at night. Set reminders on your phone or link the routine to an existing habit, like brushing your teeth. Treating nail fungus is a marathon, not a sprint. You must continue the treatment diligently even after the visible symptoms like nail discoloration start to improve, as the underlying infection may persist.
What to Expect: The Timeline for Nail Repair
Managing expectations is vital. Nails grow slowly—toenails especially, at about 1-2 mm per month. You will not see overnight results. In the first few weeks, you may notice a halt in the spread of discoloration or a reduction in brittleness. After 4-8 weeks of consistent use, the new, healthy nail growth from the cuticle should become visible. It can take 6-12 months of persistent treatment for a toenail to grow out completely and be replaced by clear, healthy nail. Patience and unwavering routine are your greatest allies.
Pro Tips for Maximizing Effectiveness
- Foot Hygiene: Keep feet dry and clean. Change socks daily, and opt for moisture-wicking materials. After bathing, use a separate towel for your feet.
- Disinfect Tools: Regularly disinfect nail clippers, files, and shoes. Fungi can linger on surfaces and cause re-infection.
- Rotate Footwear: Avoid wearing the same pair of shoes two days in a row to allow them to dry out completely.
- Protect in Public Areas: Wear shower shoes in public pools, locker rooms, and gym showers to prevent picking up new spores.
- Monitor Skin: If you have athlete's foot (tinea pedis), treat it concurrently, as it can spread to the nails.
Common Mistakes to Avoid
Even with a great product like the toenail fungus pen, mistakes can hinder progress. Avoid these pitfalls:
- Applying to Wet Nails: This dilutes the formula and prevents proper adhesion.
- Inconsistent Application: Skipping days allows the fungus to regain strength.
- Using Too Much Product: A thick layer doesn't absorb better and can waste product.
- Giving Up Too Soon: Stopping when you see the first sign of improvement is the most common reason for treatment failure.
- Ignoring Underlying Health: Poor circulation or a compromised immune system can slow healing. Address overall health.
Integrating the Pen into a Holistic Nail Health Strategy
While the Lunavia Toenail Fungus Pen is a powerful targeted treatment, think of it as the spearhead of a broader campaign. Support your body's ability to fight the infection and grow healthy nails from within. Ensure your diet includes biotin, zinc, iron, and protein. Stay hydrated. For severe or persistent cases, consider consulting a podiatrist or dermatologist who can confirm the diagnosis and may suggest combining your topical antifungal nail pen treatment with other therapies.
Conclusion: Your Path to Clearer, Healthier Nails
Successfully treating a fungal nail infection requires the right tool and the right technique. By following this detailed guide on how to use the Lunavia antifungal pen correctly—emphasizing preparation, precise application, unwavering consistency, and supportive foot care—you empower yourself to overcome the infection. Remember, the journey to nail damage repair is measured in months, not days. Stay committed to the process, trust in the systematic approach, and you will pave the way for the clear, healthy nails you deserve.